How to use SharePoint integration in DS Templates
How to use SharePoint in DS Templates
With the SharePoint link of DS Templates you can display your SharePoint 'sites' on your screens. This link retrieves recent messages.
For technical flow check: https://www.digitalsignage-templates.com/api-sharepoint/
If you want to link your SharePoint environment with DS Templates, you need to take the following steps:
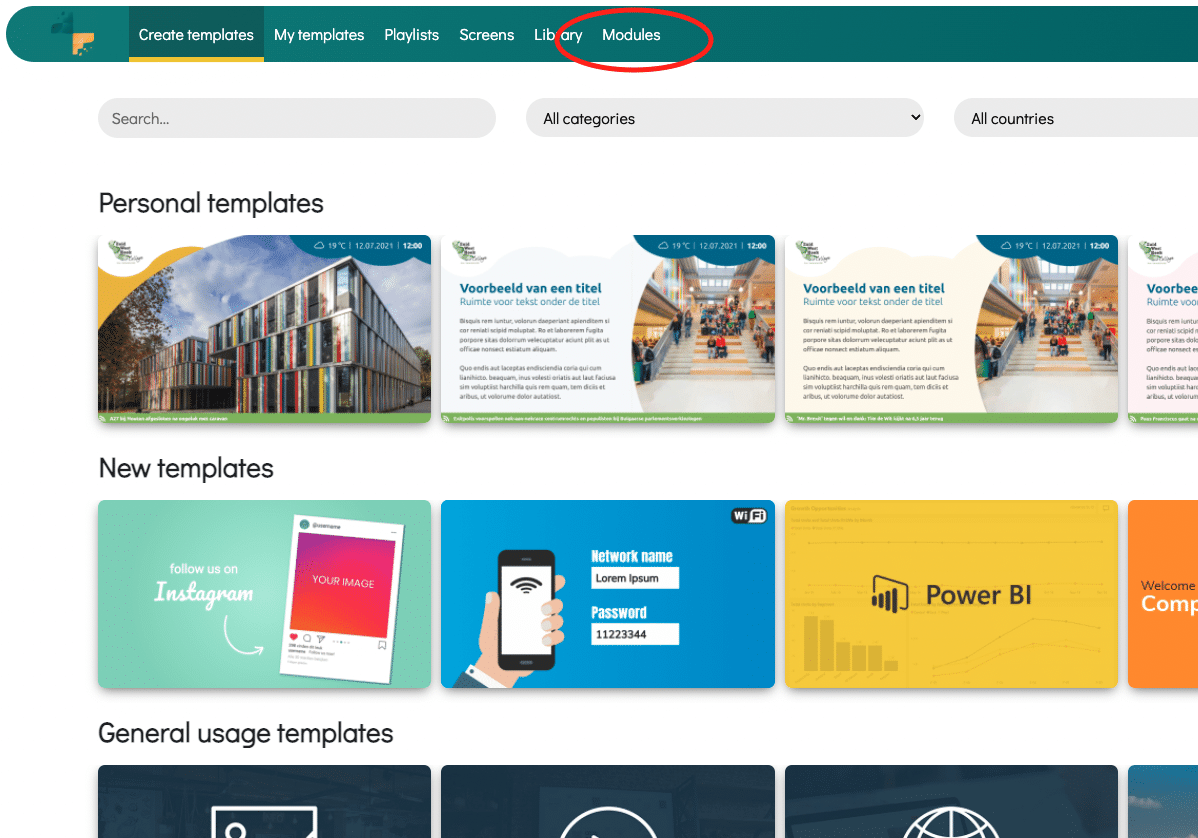
1. Go to Modules
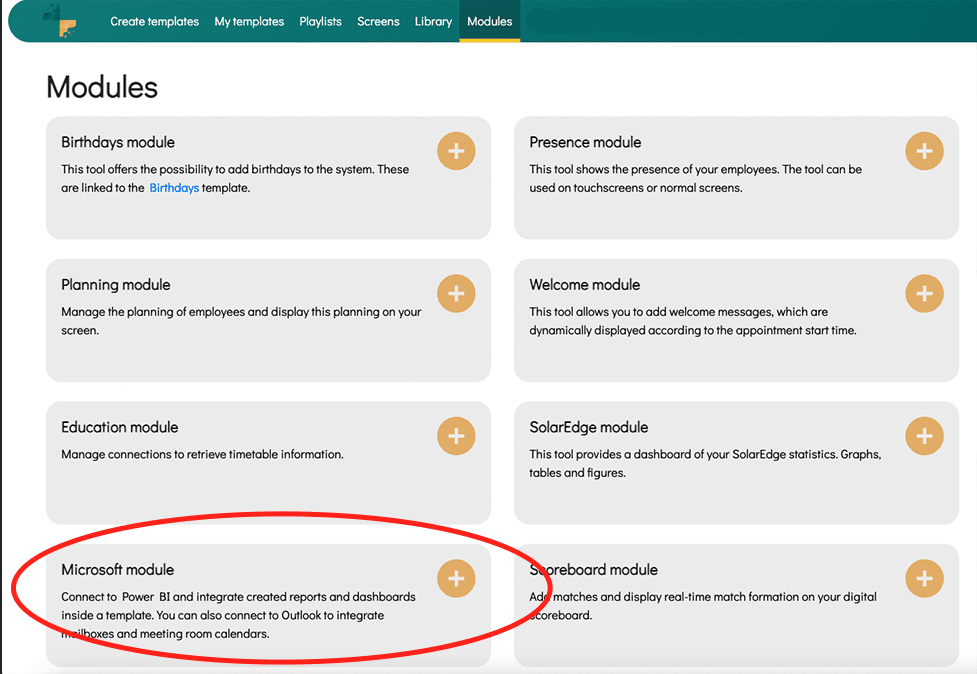
2. Go to Microsoft Modules
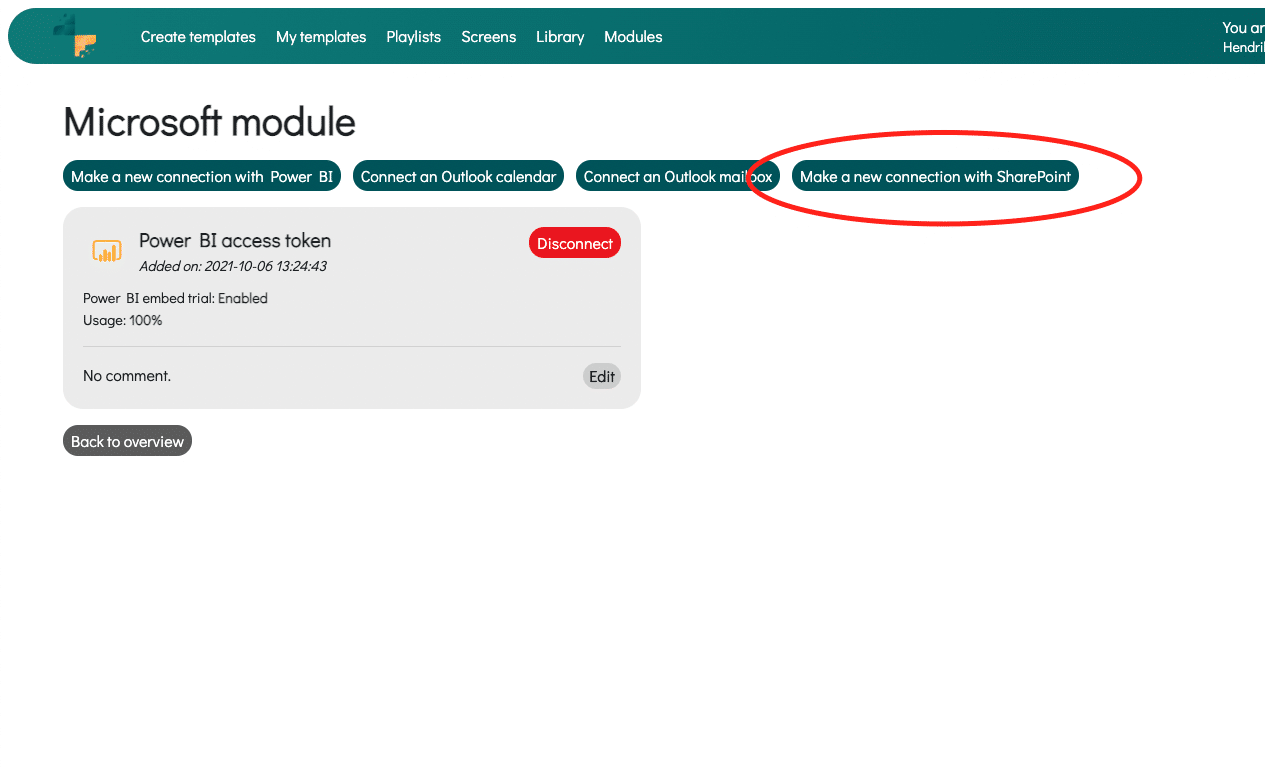
3. If you are in the Microsoft Module, click on Make a new connection with SharePoint
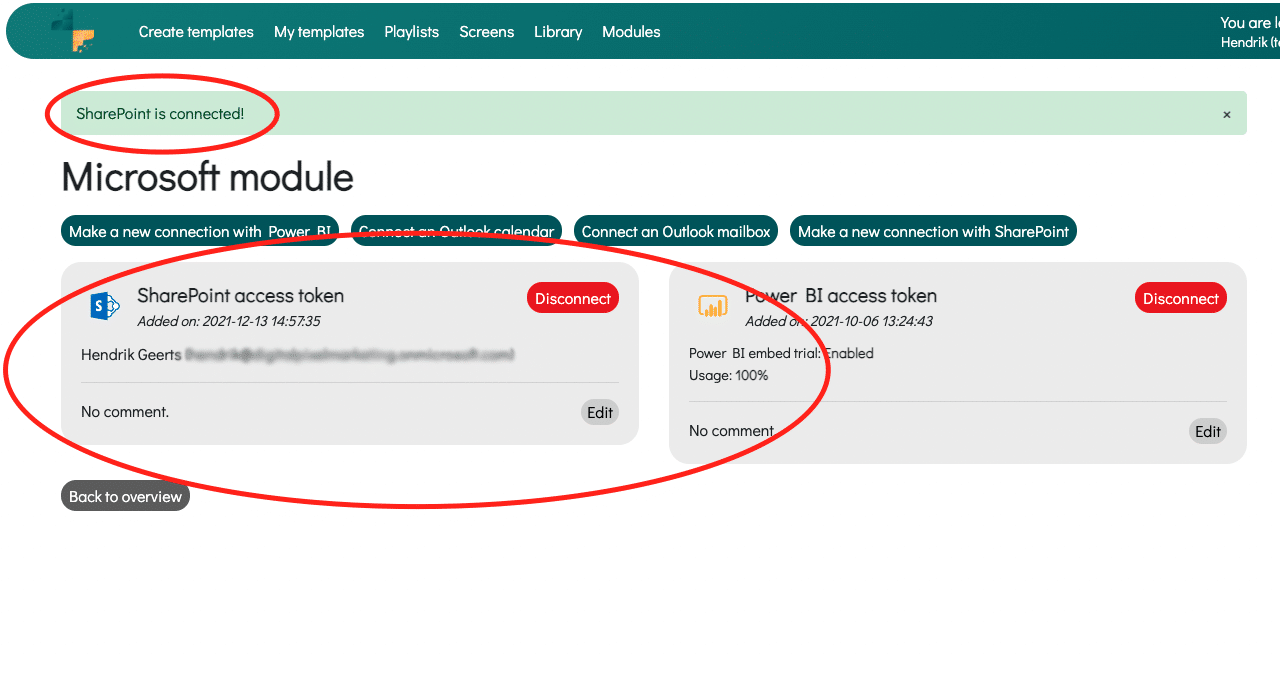
4. You will be redirected to the Microsoft login window. Make sure you have the correct rights to realize the SharePoint link. After successfully logging in within Microsoft, you can give DS Templates access to your SharePoint. After allowing this, you will be automatically redirected back to the platform. You will see the following screen:
5. The integration is complete. It is now important to create a template in which you can choose the right SharePoint Site. Go to Create Templates.

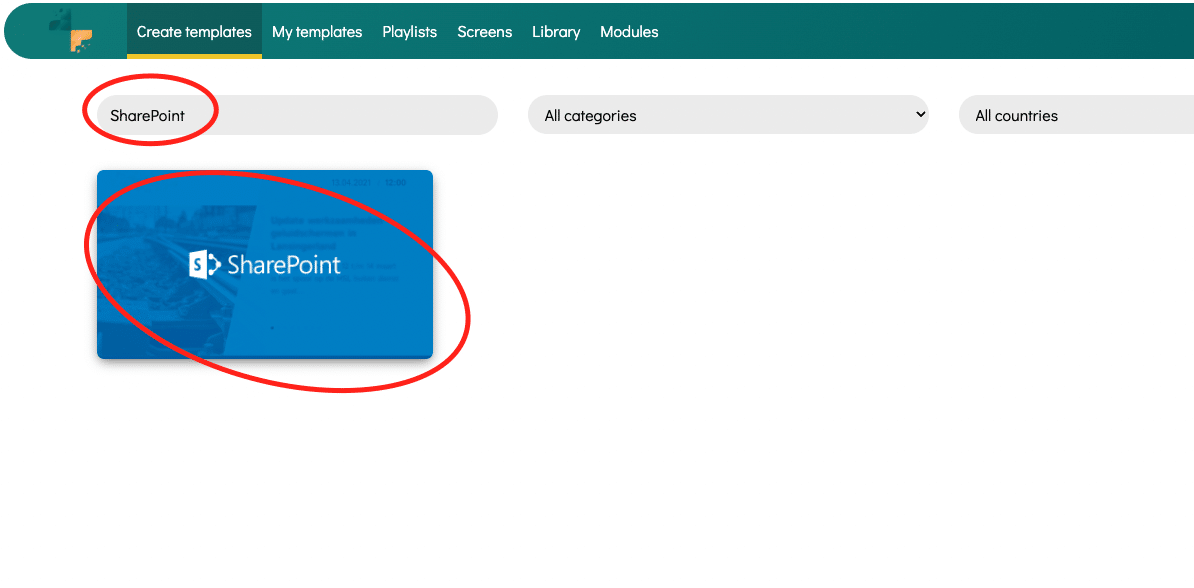
6. Then search for SharePoint in the search bar, you will then see the SharePoint template or other templates that contain SharePoint data (for example: Active 6). Click on this template or place your computer mouse on the template. Then you can click on the 'plus' icon to open the template.
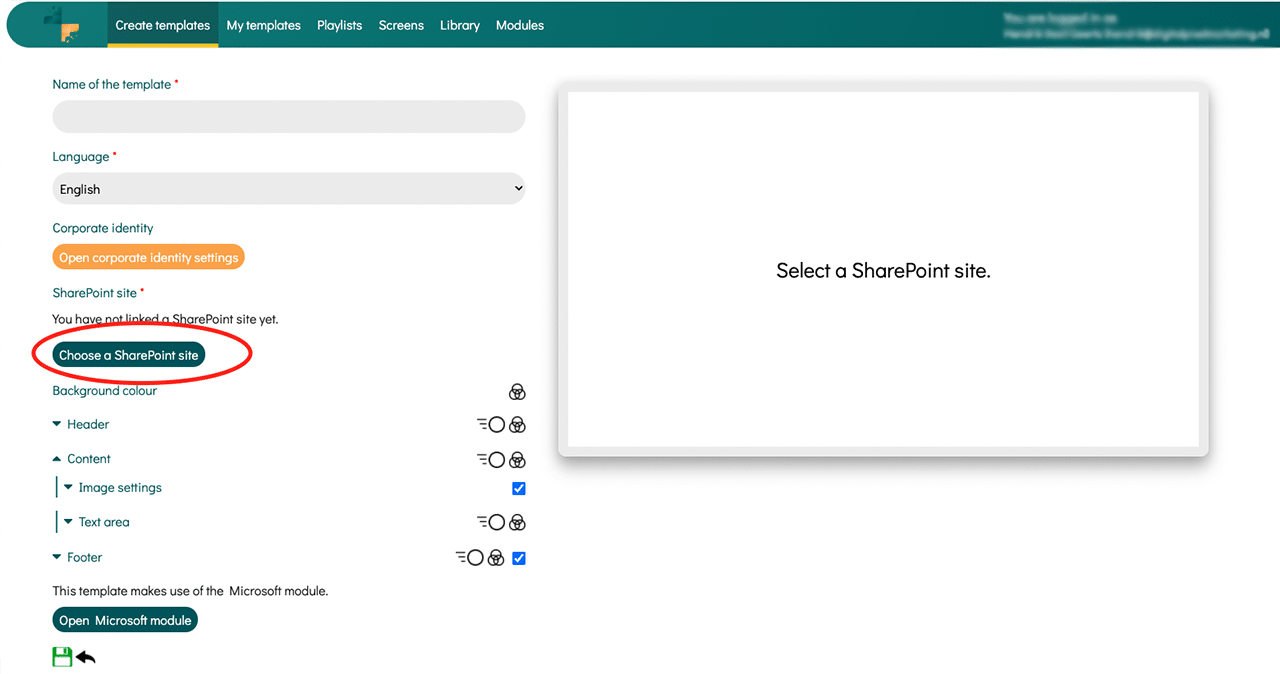
7. In the editor, click on Choose a SharePoint site. You will then see an overview of all available sites.
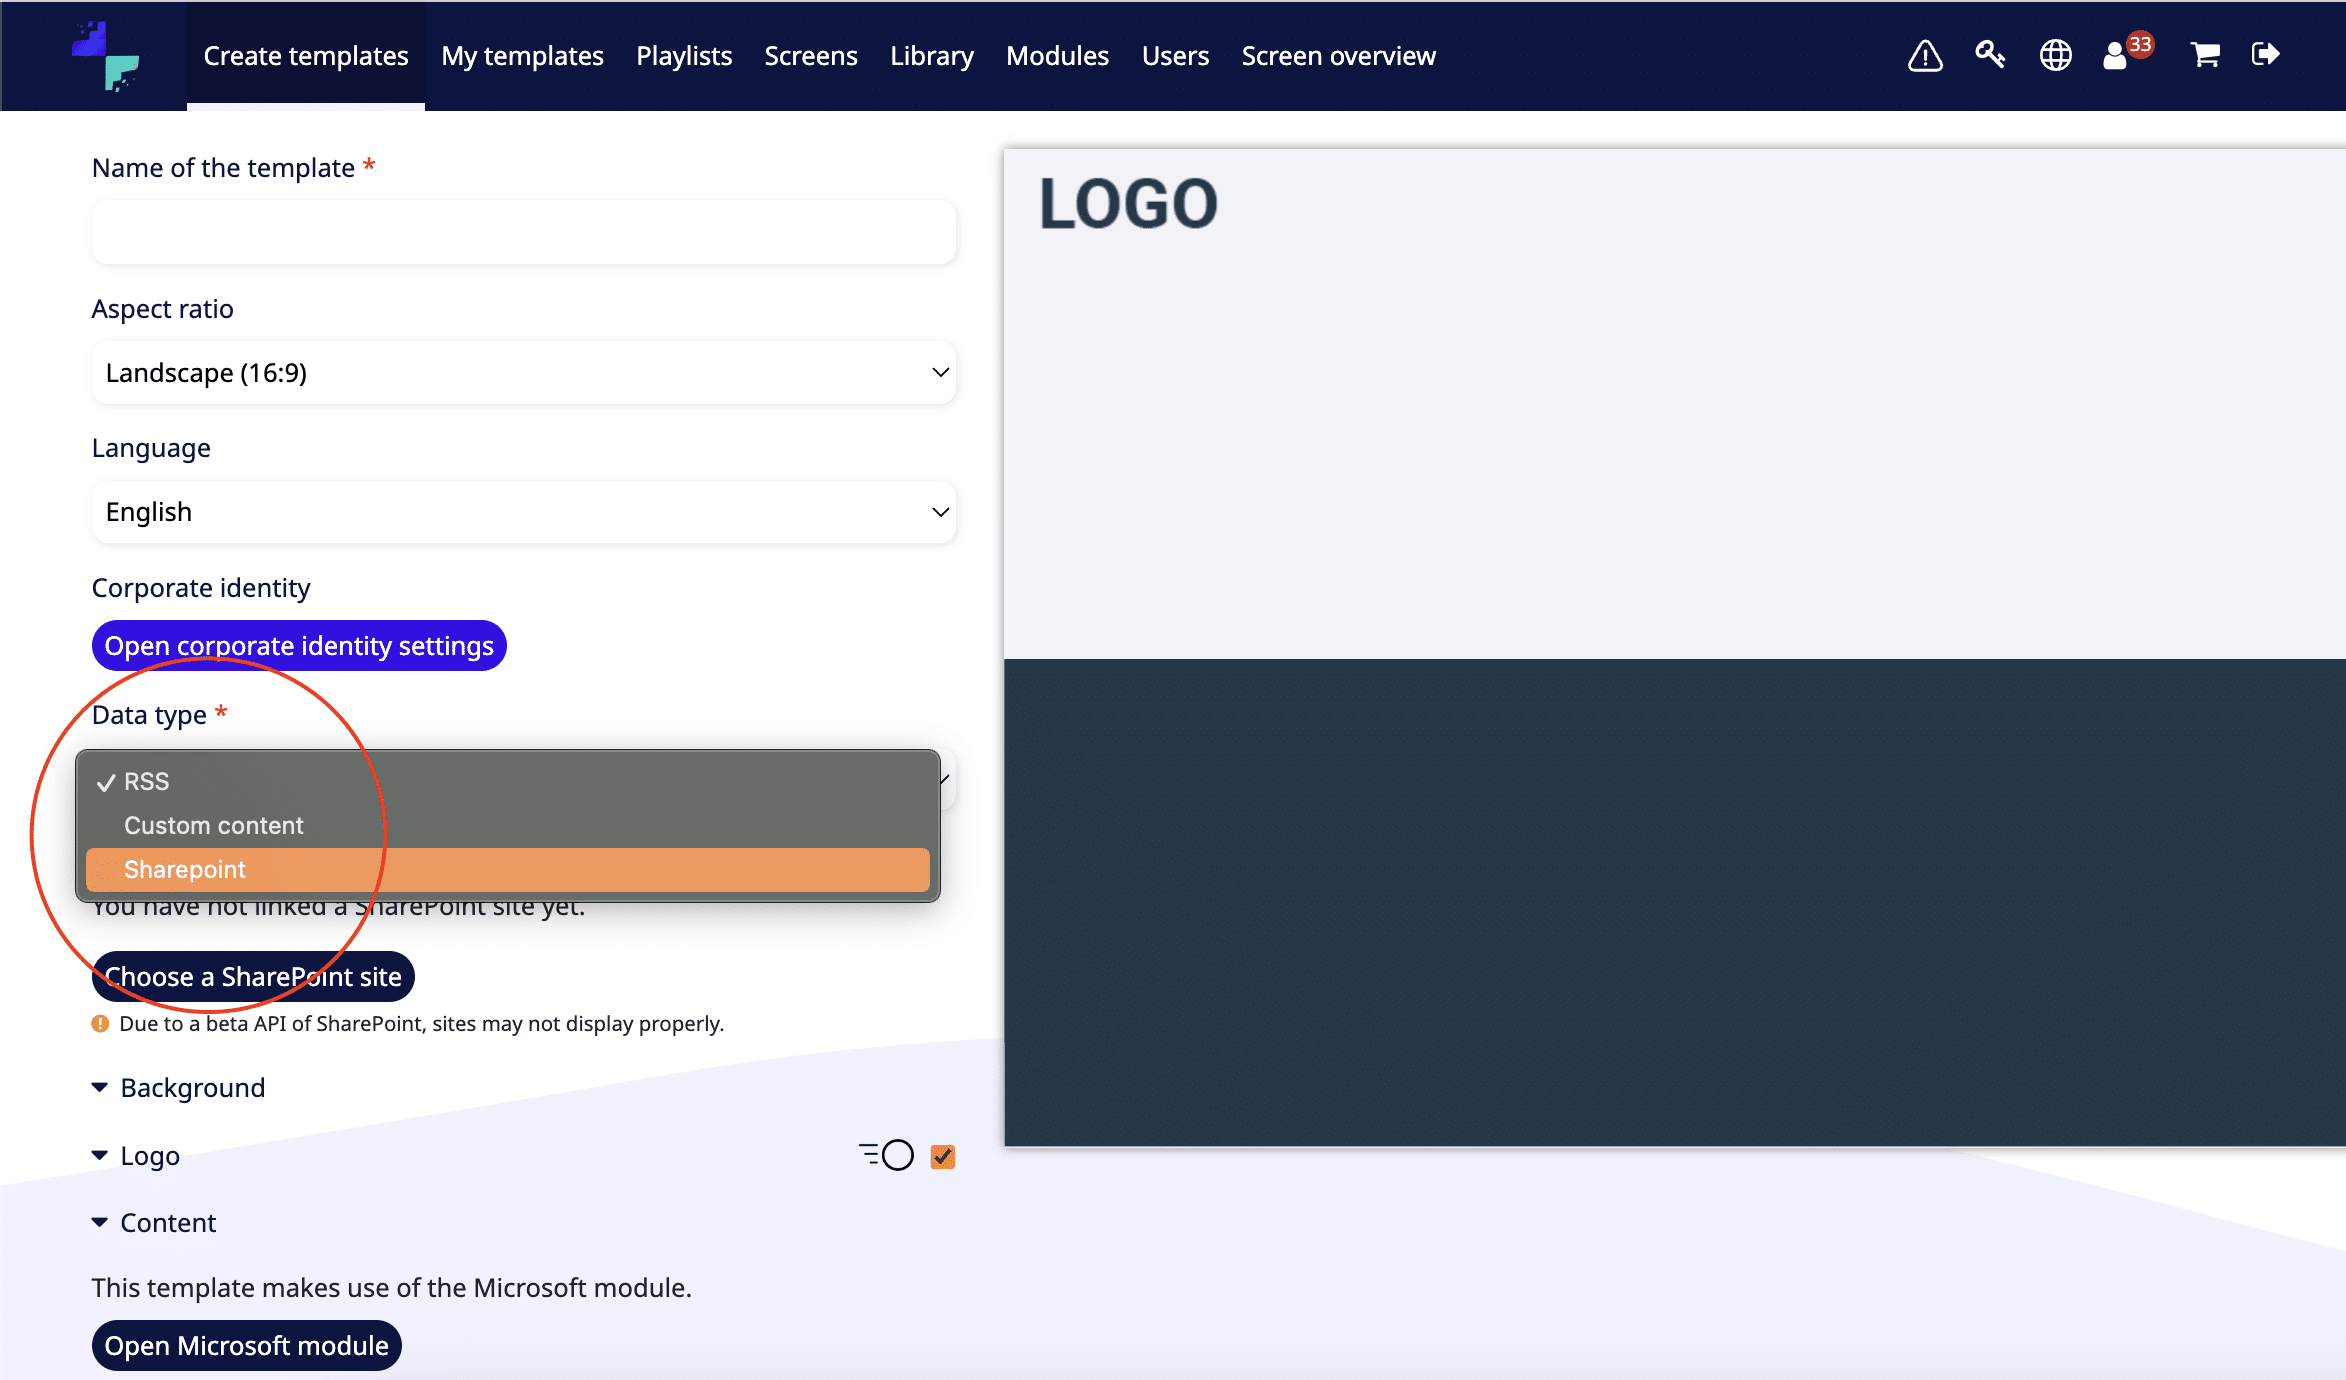
If you don't see the SharePoint in the template, make sure you select the right 'Data type' in the editor:
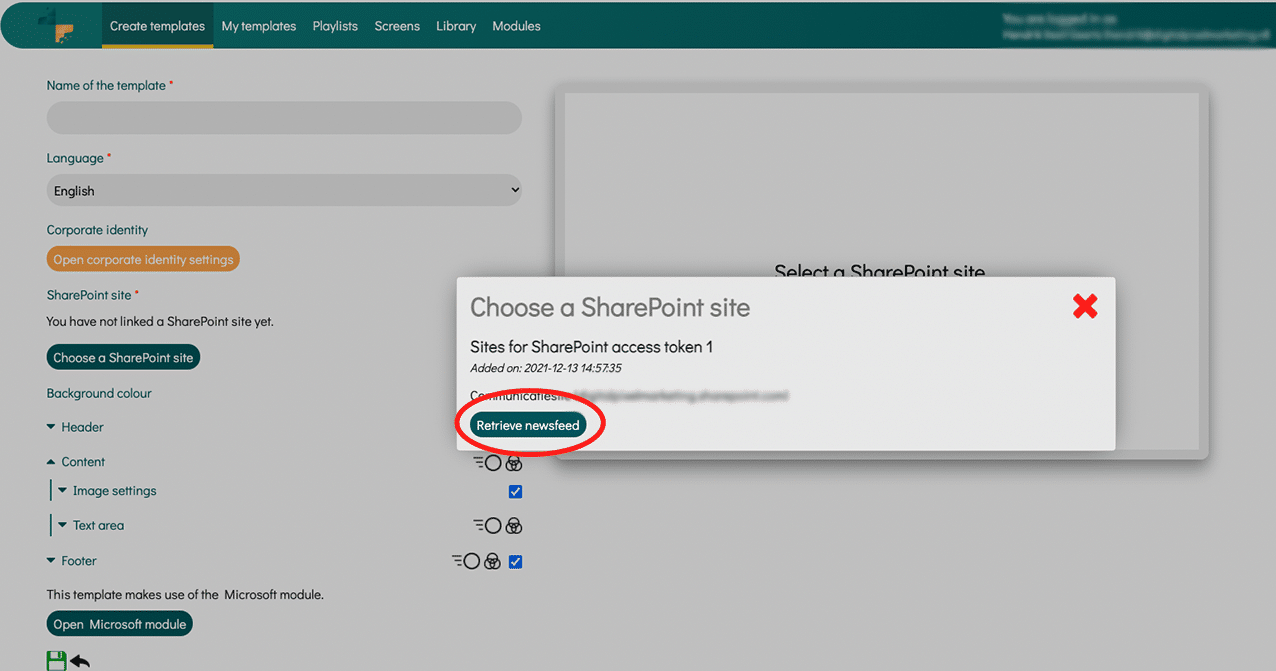
8. Then choose the site you want to show on this template. If you want to show multiple Sites, you need to create a SharePoint template several times.
9. Subsequently, all messages from your SharePoint are loaded into the template and displayed. You can now further adjust the template (colors, fonts, images) and provide it with the correct name. After saving you can publish the template on your screens.
Need help with publishing a template to your screen? Click here and scroll to chapter 8.
The integration is not working
Fix 'No access'
Required Permissions for Reading SharePoint Sites via the Microsoft Graph API
To be able to read SharePoint sites via the Microsoft Graph API, the user or application needs the following permissions within SharePoint and Azure AD:
1. SharePoint Permissions:
- Site Membership: The user must be a member of the SharePoint site from which data is being retrieved. This means the user should be added as a "Member" or "Owner" of the site.
- Read Permissions: The user must have at least read permissions on the SharePoint site. This ensures the user can access the site's content without making any changes.
2. Microsoft Graph API Permissions (in Azure AD):
To gain read-only access via the API, the following permissions are required:
-
Delegated permissions (for signed-in users):
Sites.Read.All: Allows the user to read data from all SharePoint sites that the user has access to.
-
Application permissions (for applications running without a user context):
Sites.Read.All: Allows the application to read data from all SharePoint sites in the tenant.
3. Granting Consent:
- Admin Consent: For the above permissions (
Sites.Read.All), an Azure AD administrator must grant consent (Admin Consent) before the application or user can use these permissions. - Access in Azure AD: Ensure that the application is correctly registered in Azure AD and that the appropriate permissions (
Sites.Read.All) are assigned and accepted.
Fix "Access denied"
If you have connected you're SharePoint account in the Module, but you an Access denied in the template, please check the following steps:
1. Ask the user to grant consent again:
Ensure the user attempts to log in again and accepts the necessary permissions when prompted.
2. Check the consent settings in Azure AD:
- Go to the Azure portal.
- Navigate to "Azure Active Directory" > "Enterprise applications".
- Find and select the relevant application.
- Go to "Permissions" > "User consent" and ensure that the settings allow users to grant the necessary permissions.
3. Verify SharePoint permissions:
- Check if the app has the correct permissions within SharePoint. You can do this by going to the SharePoint Admin Center and reviewing the app permissions.
4. Review app registration settings:
- In the Azure portal, go to "Azure Active Directory" > "App registrations".
- Find and select the app.
- Under "API permissions", check if the correct permissions are requested and if they require "Admin consent".
5. Request Admin Consent:
- If the app requires "Admin consent", a global administrator of the tenant needs to grant this consent. This can be done by having the administrator log in and approve the necessary permissions through an admin consent URL.
6. Check if there are policies blocking consent:
- Policies in Azure AD might block app consent. Check if any Conditional Access Policies or other policies might cause this behavior.
Here is a step-by-step guide for the Azure Portal:
Verifying and Adjusting Permissions in Azure AD
1. Check Azure AD:
- Log in to the Azure Portal.
- Go to "Azure Active Directory" > "Enterprise applications".
- Find and select the relevant application.
- Go to "Permissions" and verify if the correct permissions have been granted.
2. Grant Admin Consent:
- Go to "Azure Active Directory" > "App registrations".
- Find and select the app.
- Go to "API permissions".
- Click on "Grant admin consent for [your organization]" to grant admin consent.
3. Review Conditional Access Policies:
- Go to "Azure Active Directory" > "Security" > "Conditional Access".
- Check if there are any policies in place that might block the app's access or permissions.
Try these steps and see if the issue is resolved. If the problem persists, you may need to gather further details from the logs or contact your organization's IT administrator for assistance.